Some projects need degassing, since bubbles can be a problem sometimes. For example, casting resin in a mold, without degassing, means you’ll have to repair a lot of tiny damages on the surface. If you’re casting a soft material, like a silicone, it means you’ll have an uneven consistency of the final piece because of the holes inside. If you want to try metal casting, a plaster mold can go from cracking to exploding for the expansion of air trapped inside as bubbles.
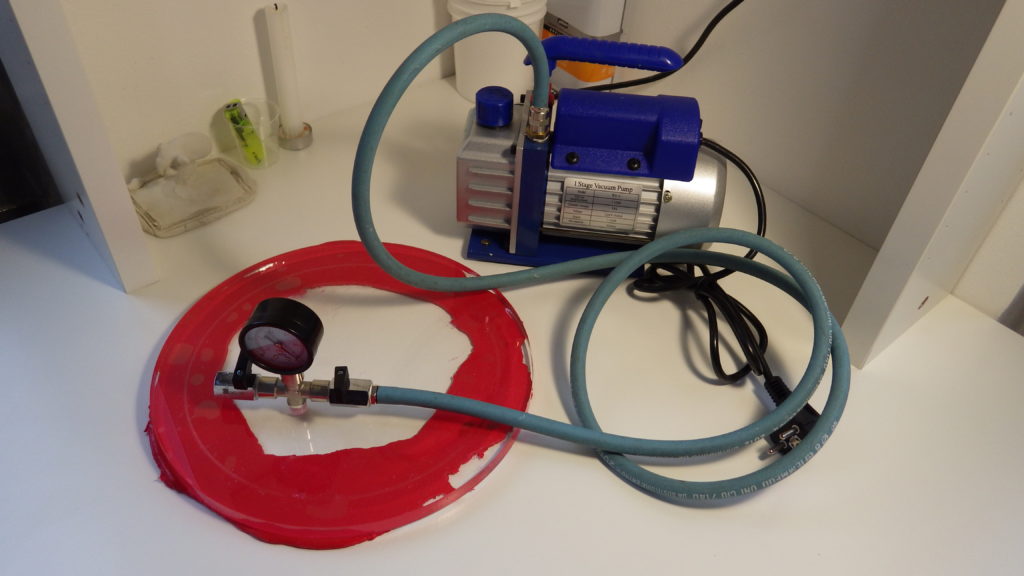
For these reasons, I decided to build a vacuum chamber.
Materials
Vacuum pump (minimum 40Liters/min, the more L/min the better, since it will make vacuum faster)
Steel pot, don’t use aluminum, it’s too soft, and search for a pot with a thick bottom
Fittings, all of the same size of your pump’s inlet (mine was 1/4″):
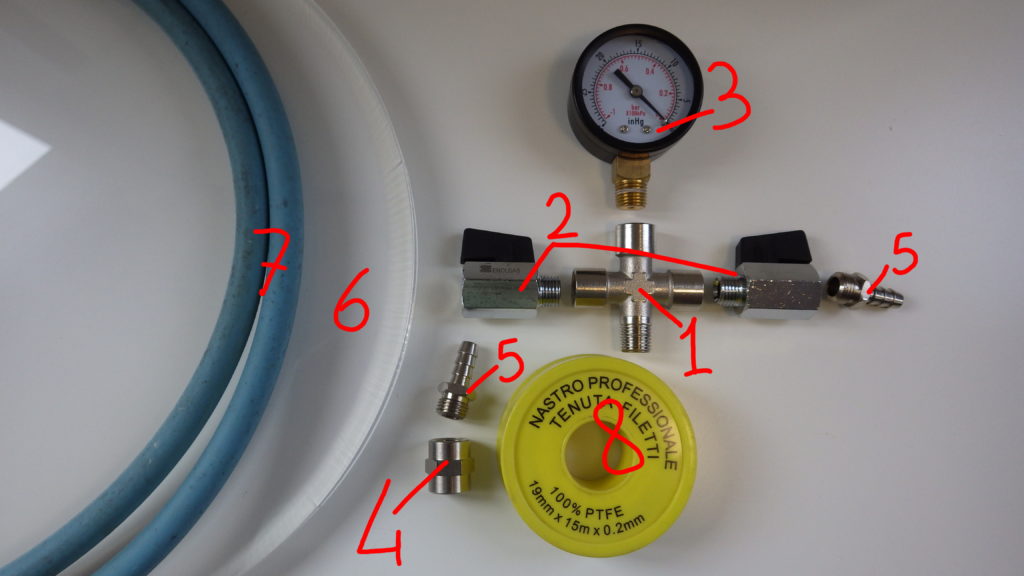
(1) 1 Cross with 3 females and one male
(2) 2 Ball valves female-male
(3) 1 Vacuum gauge
(4) 1 Female-female fitting, since the pump’s inlet will male, and the hose barbs too
(5) 2 Hose barbs, the size to fit snugly your hose (mine are 8mm, for a standard EU gas hose)
(6) 1 Synthetic glass lid, at least 15mm thick, for large containers would be better a 20mm one
(7) 1 Rubber hose, thick and stiff, that won’t collapse with the vacuum, mine is a common gas hose
(8) PTFE (Teflon) tape, to be sure that the connections won’t leak
You’ll need a gasket material too: you can search for a rubber sheet, buy some liquid gasket material or go for a homemade gasket material, that will be made of silicone caulk mixed with starch
Tools
Taps, to make a threaded hole to fit the cross fitting
Drill, with a drillbit the right size for the taps, a vertical drill would be the best
Wrenches the right size for your fittings
How to assemble
First of all you need to make the threaded hole in the lid. Drill a hole, not in the center of the lid, since you don’t want air to be shot in whatever you put inside the chamber when you open the air valve, the hole needs to be the same size of the inner diameter of the fittings’ thread, or simply, large enough to just let in the first tap.
Taps are usually in series of 3: you’ll notice one duller, one perfectly threaded, and one in between. You have to use them from the dull to the complete thread, they will carve the thread in steps. The easiest way to thread a hole is to work with a vertical drill, turning the drill head by hand, since it cannot go that slow. You’ll discover it’s actually pretty easy done this way.
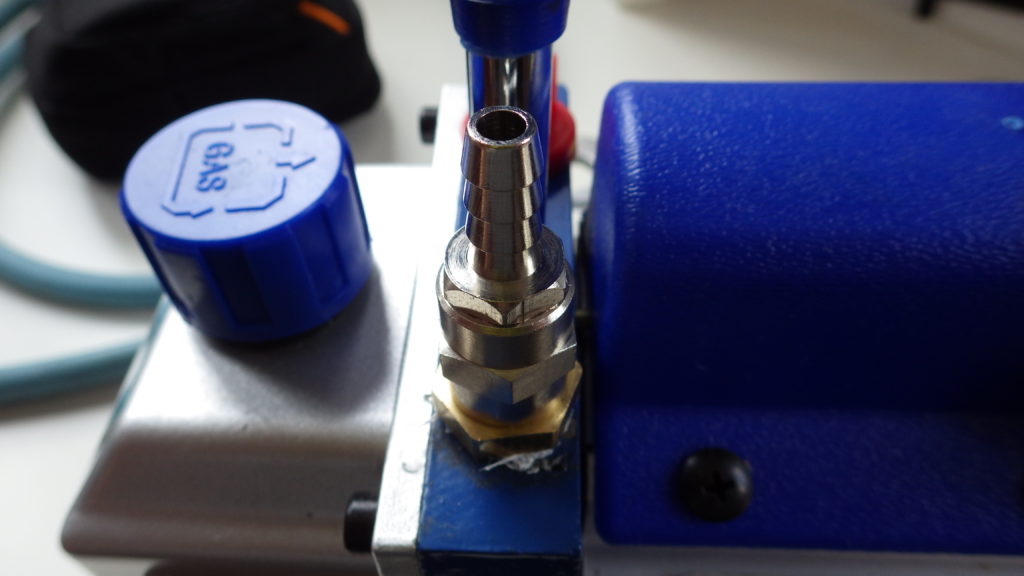
Next you have to assemble the fittings: the cross will have valves on the sides, the vacuum gauge on the top, and one of the valves will have the spike for the hose. Every thread needs to be covered in PTFE thread, or they will leak air in, so you won’t be able to get a good vacuum, and it won’t last, so you’ll have to keep the pump running to keep up with the leaks.

You have to assemble in the same way the hose spike on the pump.
Next you have to create the gasket for the lid, or the chamber won’t be able to keep air out, or could even get damaged for the hard steel pressing against the relatively brittle synthetic glass. If you found a rubber sheet, then just cut out a ring, and you have your gasket, but if you didn’t find it, then you can just make your own.
By mixing one part of silicone caulk with one part of starch (by volume), you can get a fast setting, durable rubber. By mixing a bit of pigments in the starch it will be easier to see when it’s thoroughly mixed. I won’t lie to you, mixing this stuff is very messy, it’s not easy with a stick, so you’ll probably end up doing it with your hands (use GLOVES), but it will still be a mess, but it’s quite a good and cheap alternative to make easy, durable rubber things.
This material will set quite fast, so mix as fast as you can, then make a donut on the bottom of the lid, and squeeze the material against a perfectly flat surface. To be sure that it won’t stick to the flat surface, cover the surface with plastic wrap before the squeeze. Leave it there to set for about an hour, then move it in a well ventilated area, because the caulk will release a large amount of solvent gases, and they have a very strong and unpleasant smell of vinegar. It will stop smelling in a day or two, as soon as it’s completely hardened.
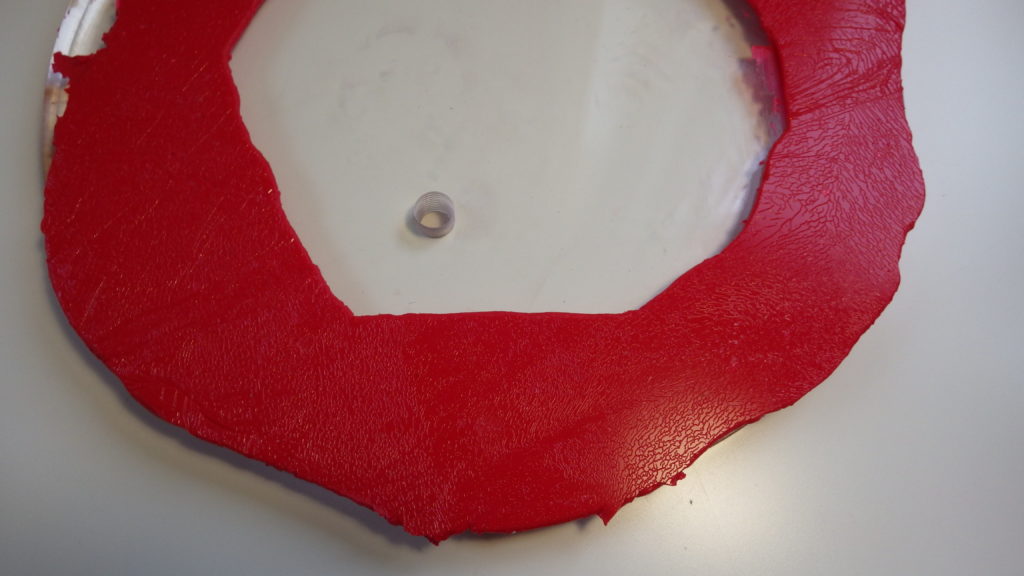
It’s not important that it is perfect, it just needs to be wide enough for the pot you’re gonna use as a chamber.
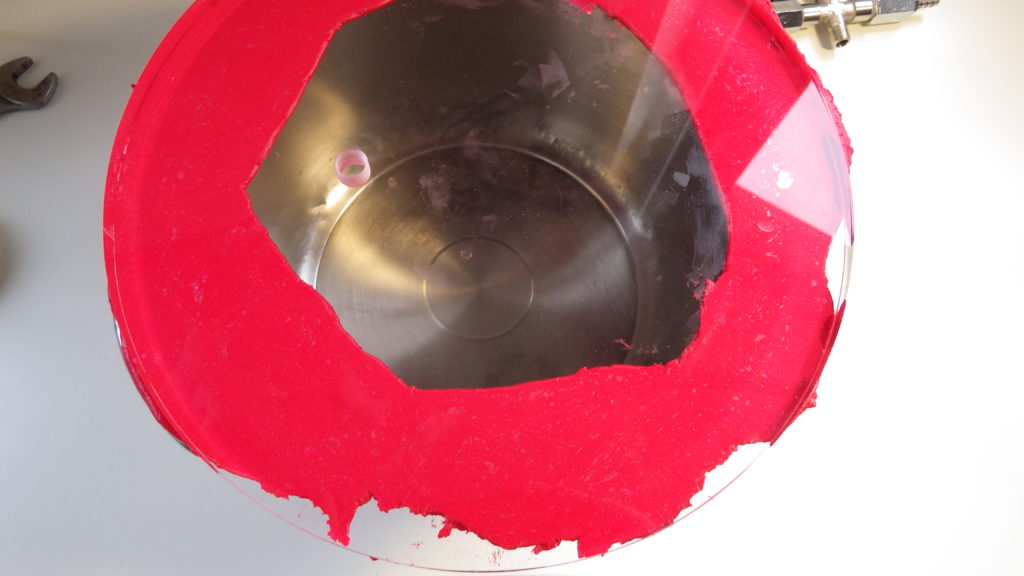
Now you can fit the cross in the lid, again using the tape to seal.
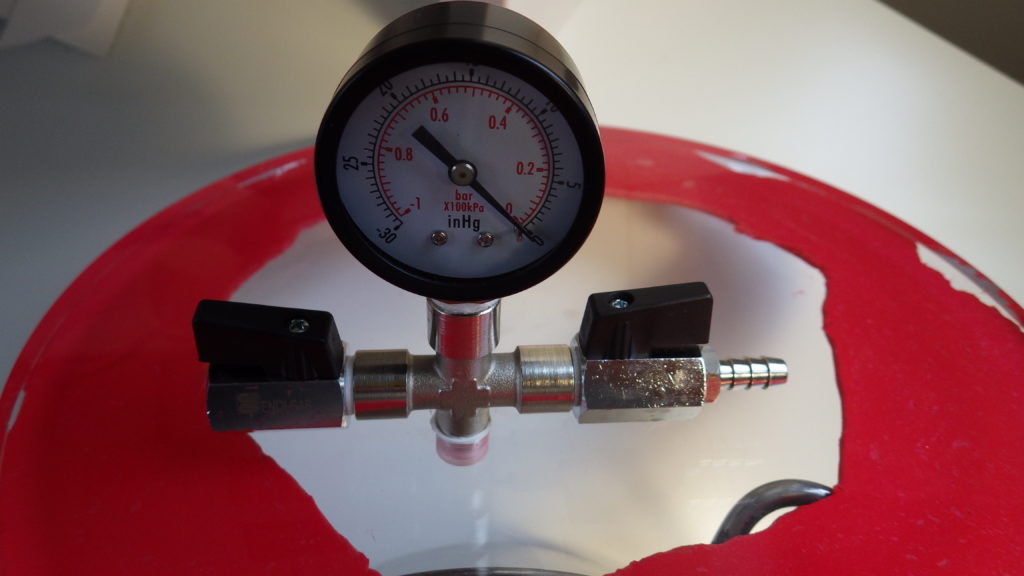
Just fit the hose and you’re ready for testing!
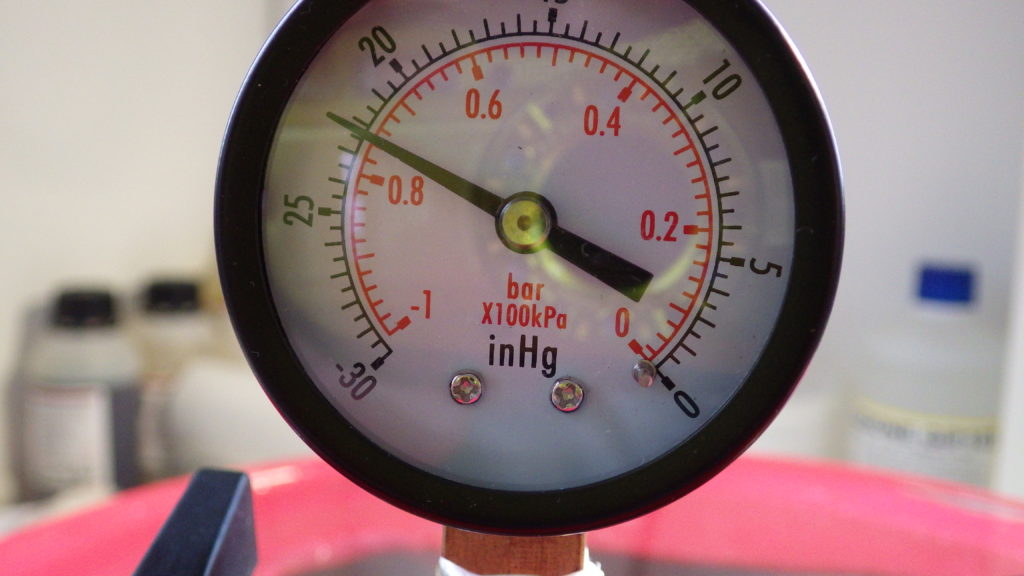
My pot wasn’t especially thin, but it had a uniform thickness, and the flat bottom needs extra thickness to be stiff enough, so before reaching -0.8 bars the bottom started collapsing. I found no leaks, and when I stopped the pump, the vacuum gauge kept the same value, so everything works, I just need a pot with a thicker bottom.
An upgrade to this system would be to put a fast connector on the pot side of the hose, so you can easily switch from the vacuum chamber to anything else that needs the pump, as, for example, a vacuum bag for fiberglassing.
I hope this have been useful to you too, I’m going to need this vacuum chamber as soon as the weather get better, to degas epoxy for the boat finish!