I needed to build a bevel jig to make knives’ blades, and for that, there is a pretty standard way to build that kind of jig. Alas, they’re always made completely out of metal, requiring quite some welding and threading, and I don’t have threading equipment, nor anything more accurate than an angle grinder for cutting steel stock, plus I couldn’t find any big hinge that wasn’t coated, and this means I’d have to remove the coating before welding, not a fun and fast job. So I came up with a method to build the usual jig without welding, threading, and with little tools, very cheap too. Here I’ll show you how to do the same!
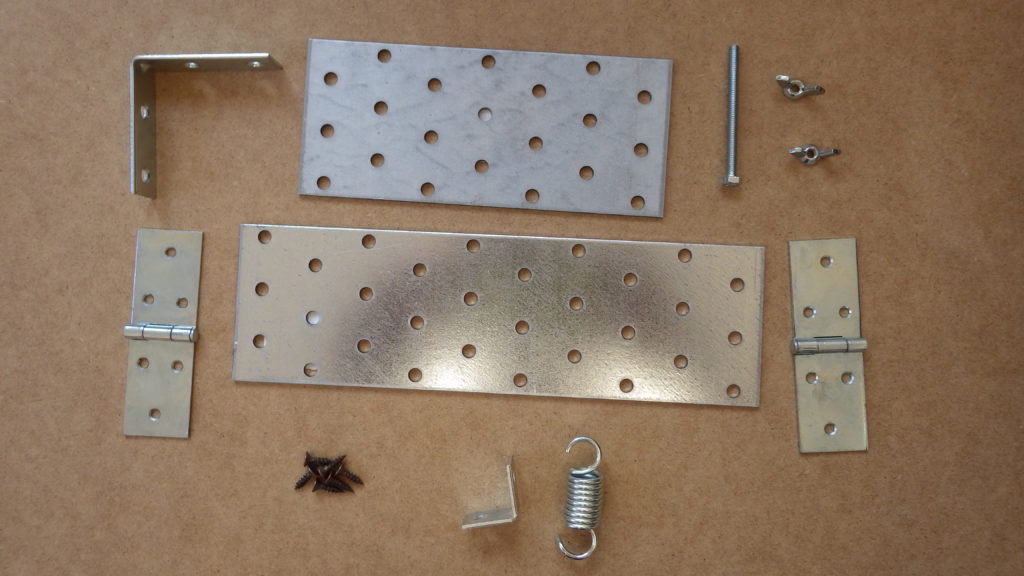
Materials
MDF ~15mm thick, at least 14×13 cm, <2€
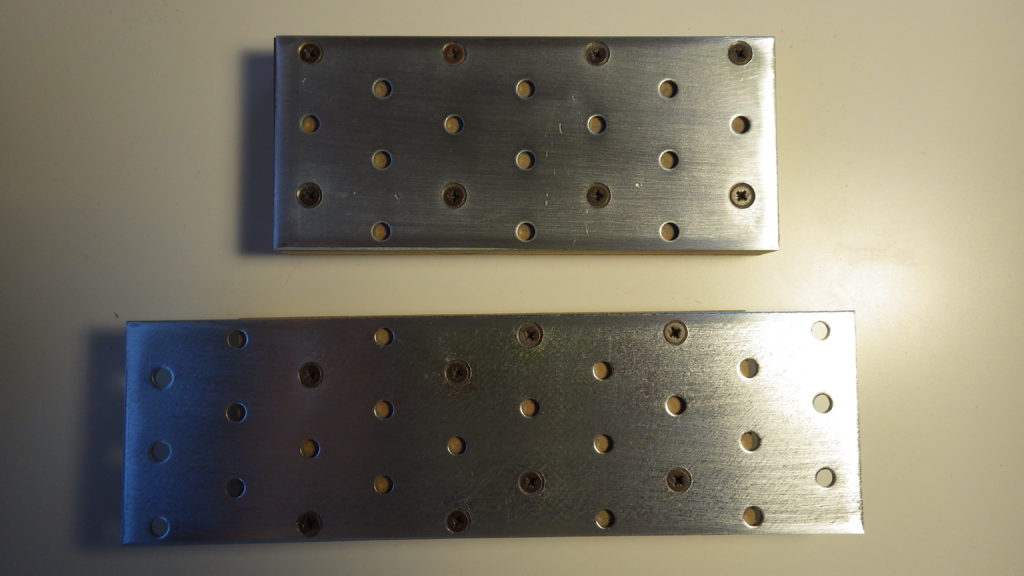
1 Steel plate, 6×14 cm, 1.60€ (We will call this Bottom Plate)
1 Steel plate, 6×20 cm, 2€ (We will call this Upper plate)
2 Hinges, 1.15€
1 Angle bracket, 6×6 cm, 0.20€
1 Bolt, ~7 cm length, the size of the bracket’s holes, 0.20€
2 Butterfly nuts, same size as the bolt, 0.40€
31 Wood screws, 12mm long, width right for the bracket’s holes, ~2€
Optional:
1 Angle bracket, 2×2 cm, 0.10€
1 Spring, ~4 cm long, 1€
Tools
Drill (Drill press would be better, but you can use handheld ones too)
Screwdriver
Table saw (You can ask the seller if they’ll cut you the MDF in 2 pieces 6×14 cm, so you won’t need it)
Medium Sandpaper
Total cost: about 10.65€
Building the jig
Cut the MDF to get 2 6×14 cm pieces.
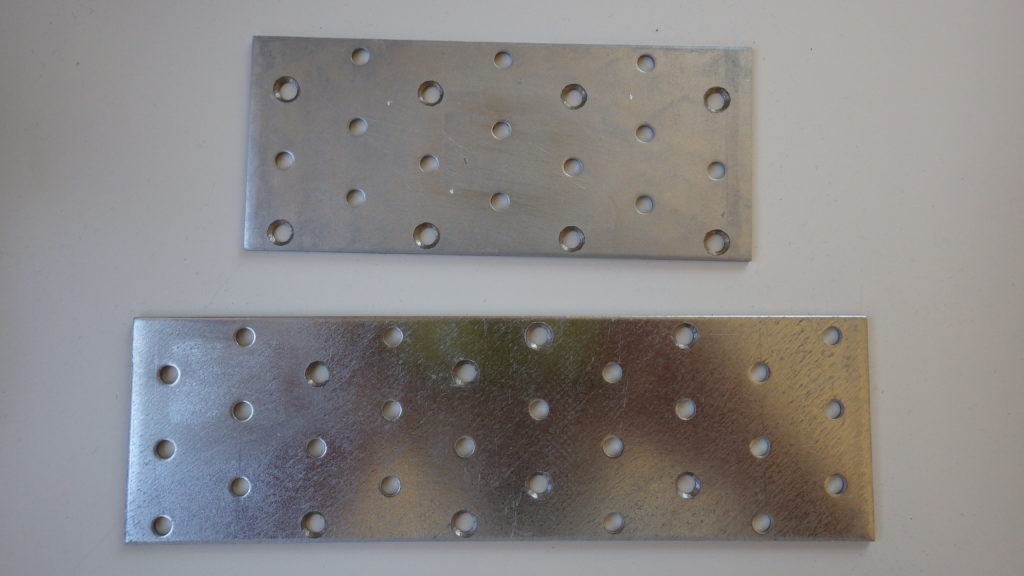
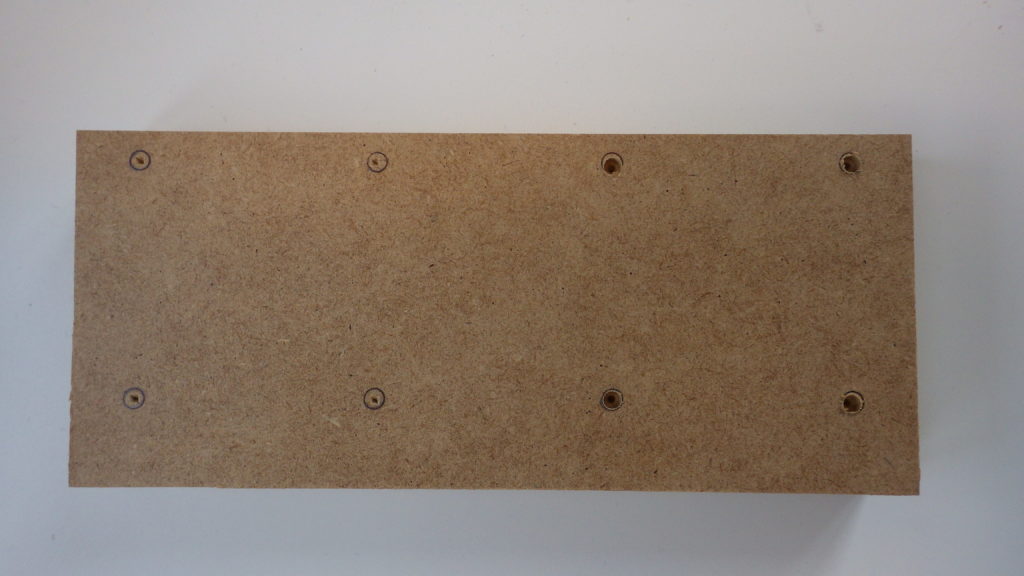
Take a drill bit wider than the wood screws’ heads, and use it to bevel 8 holes in the smaller plate. Be careful, it’s easy to go too deep, you just need them to be deep enough to get the screw’s head flush with the plate’s surface. After that, do the same thing on the larger plate, but choose holes that are inside the area of the smaller plate, because you’ll have to fix both on the MDF boards.

Mark the holes for the screws on the MDF. We will call the board traced from the upper plate Upper board, and Bottom board the one traced from the bottom plate.
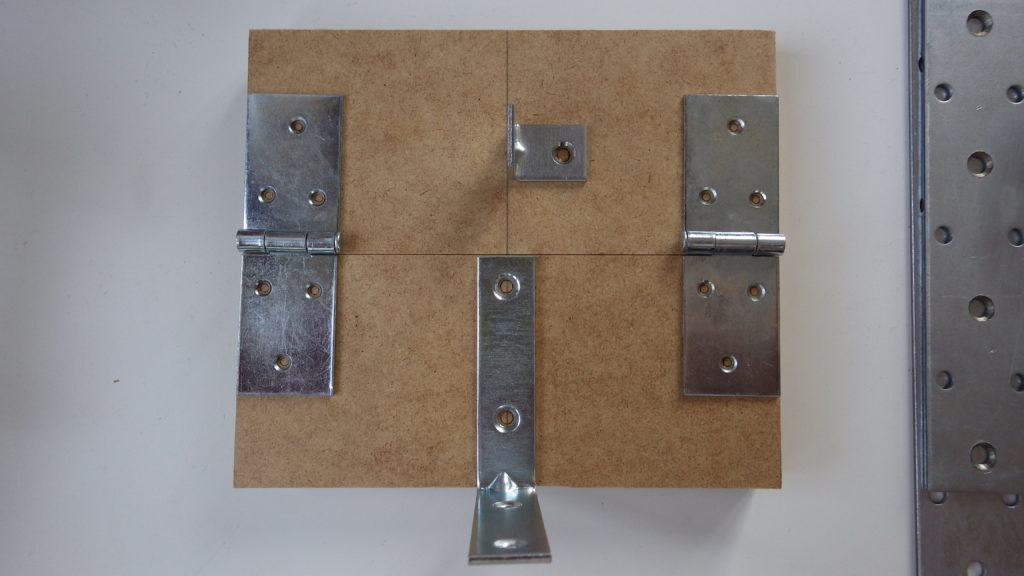
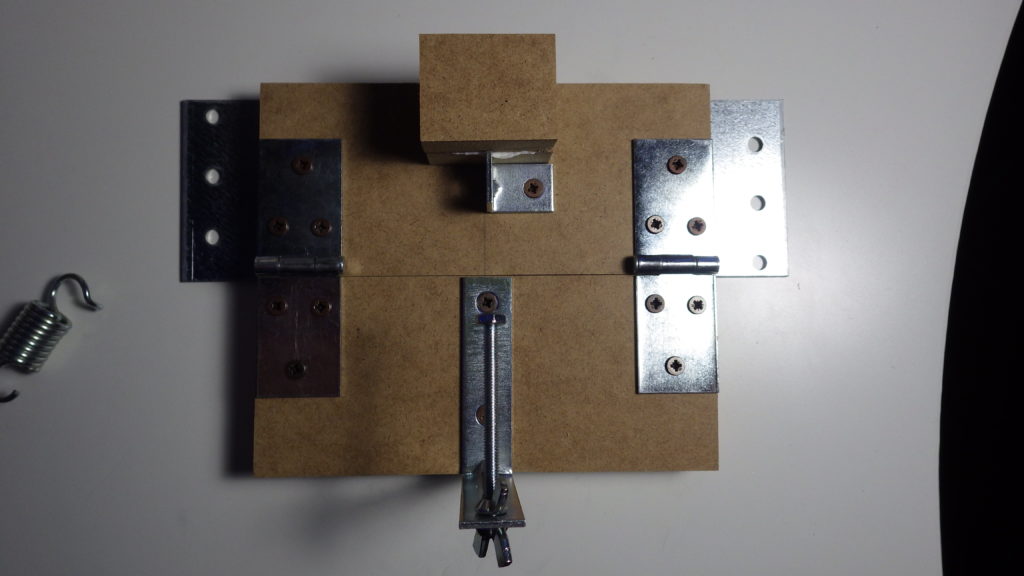
On the reverse side of the boards, trace the middle line. Put the long bracket along the middle line of the bottom board, the short bracket on the side of the upper board’s middle line, roughly at the center of the width. Put the hinges along the edges, with the inside of one plate precisely along the border between the boards, so you’ll be sure they will be well aligned. Now mark all the holes.
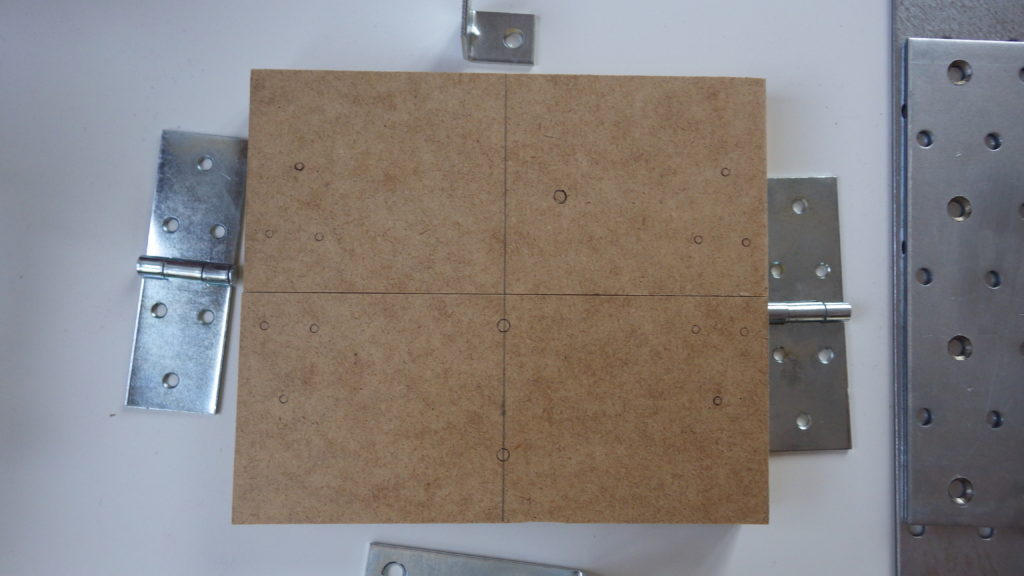
Take a big nail and mark the center of the holes so both the screws or the drill bit won’t slide around. If you have a drill press instead of a handheld drill, you can take a small bit and drill a very shallow, small pilot holes, so you’ll be sure to drive all the screws perfectly straight! Don’t overdo the holes, for such small screws they are needed just to put them straight, there is no risk of cracking the boards, that’s why with a handheld drill you shouldn’t try this, since it’s difficult to go straight with it.

Now it’s time to put the screws to fix the plates to the boards. Don’t tighten too much the screws, or you’ll ruin the MDF and they’ll come loose, it’s not the toughest material to set screws in, but we’ve used it because all wood, even plywood, twists, cups and bends in various ways with time, while MDF is much more inert, it’s unlikely to deform in any way, and fixed like this to steel plates, it’s guaranteed to stay stiff and in shape.
After finishing with the screws, take a sanding block and clean the surface of the plates, that will have some small burrs around the beveled holes, and maybe some screws will protrude a little, so we get a smooth flat surface. If you don’t have a sanding block, just put the sandpaper on something flat and rub the plate on it.
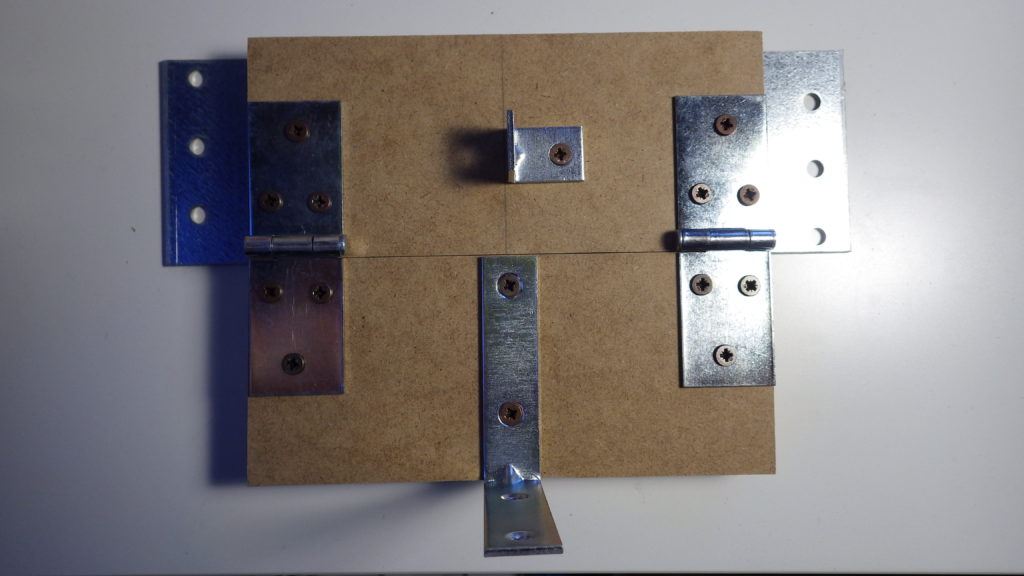
Screw all the other bits too.
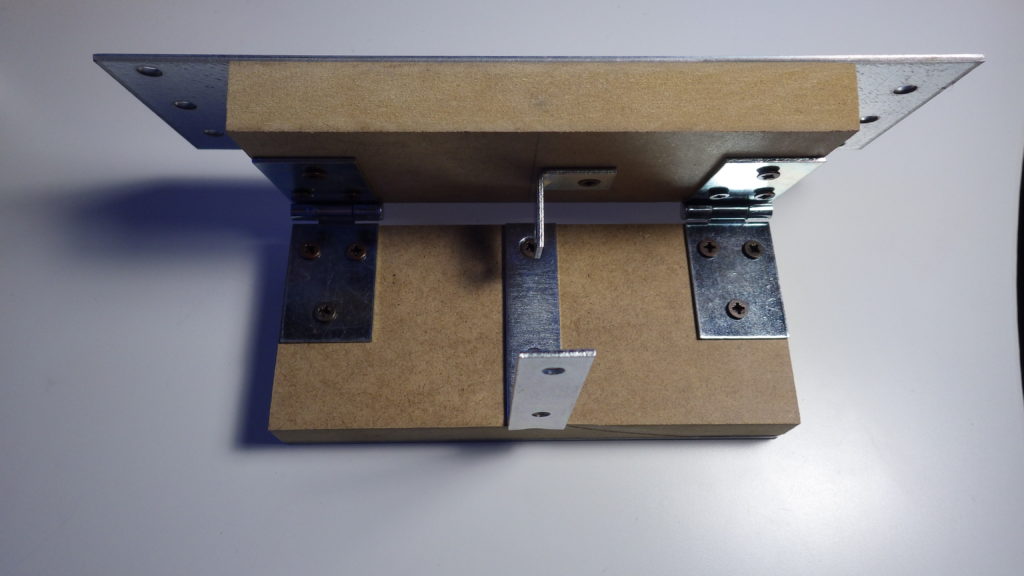
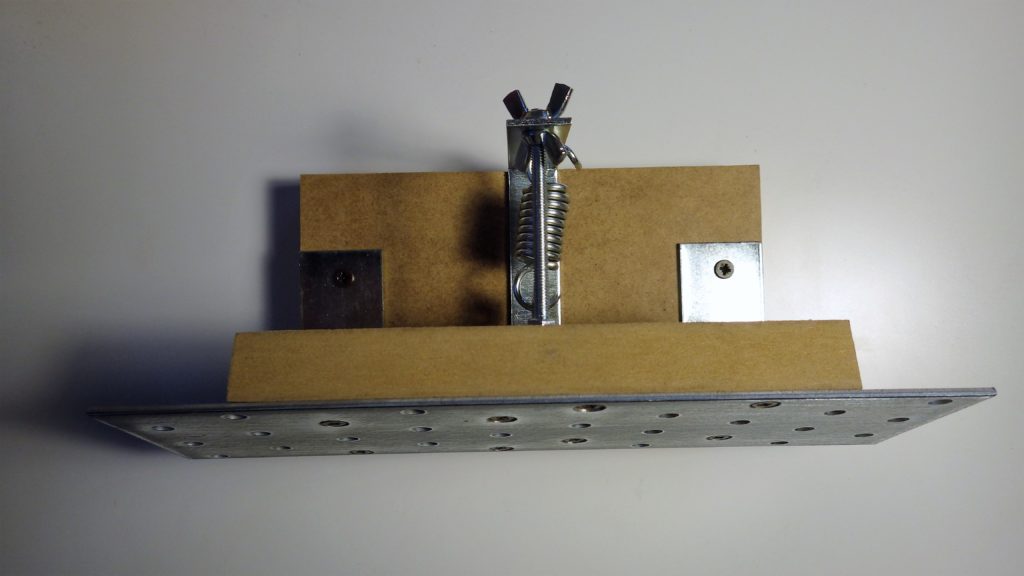
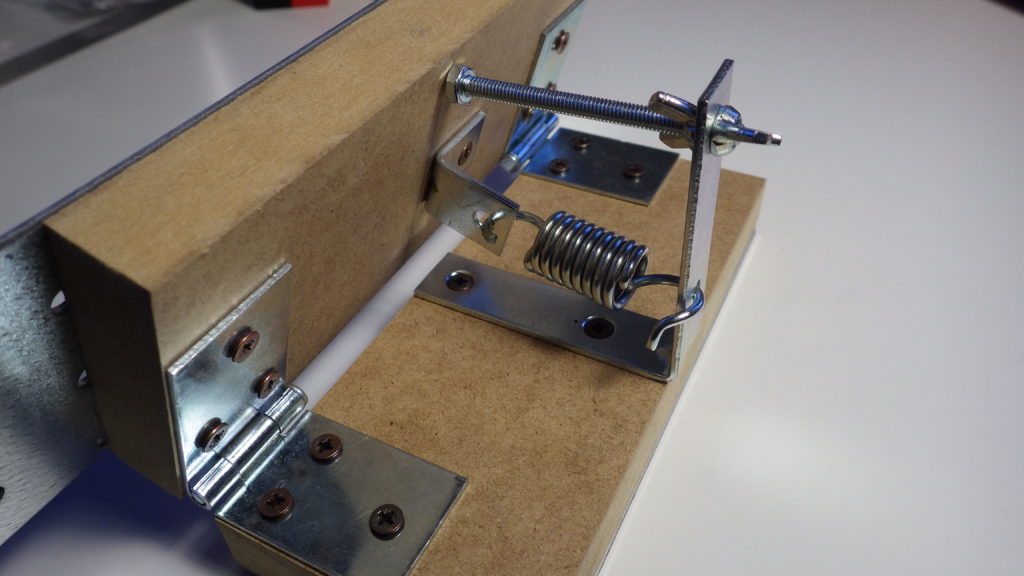
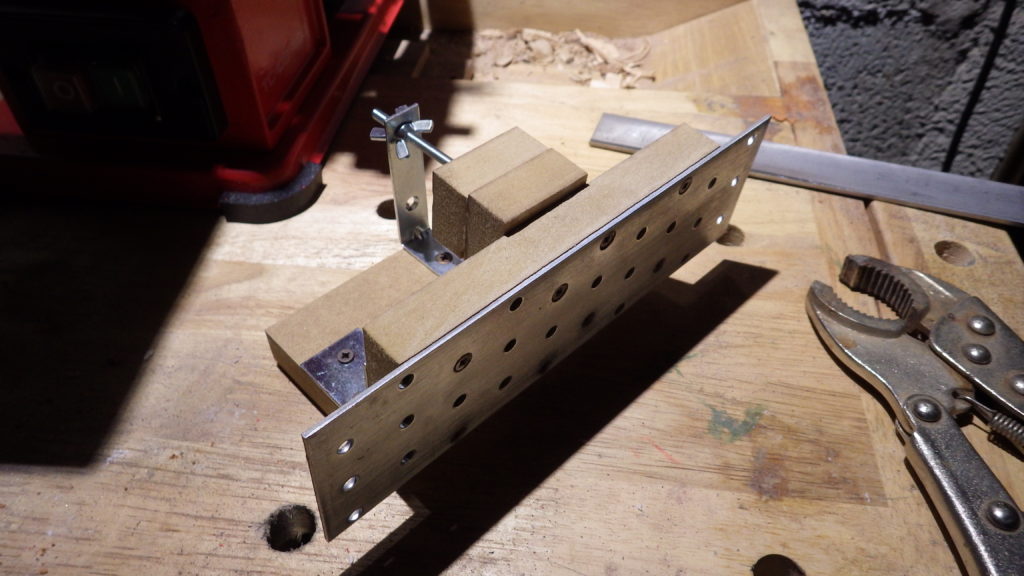
Put the bolt in the upper hole of the big bracket, with the head against the upper board, and the two butterfly nuts opposite tightened around the bracket: in this way you’ll be able to adjust the angle of the upper board, where the blade to be beveled will be fixed. The spring links the big and the small brackets, and pulls the boards together, so it stabilizes the tool
Problem solving…
It turned out that the only spring short enough I could find was SO stiff, that it couldn’t extend at all. No problem, the hinges were a bit stiff, so the jig isn’t moving by itself, and while grinding a blade you push lightly against the belt sander, so the spring isn’t really needed, you’ll already have a force keeping the board tight against the bolt’s head!
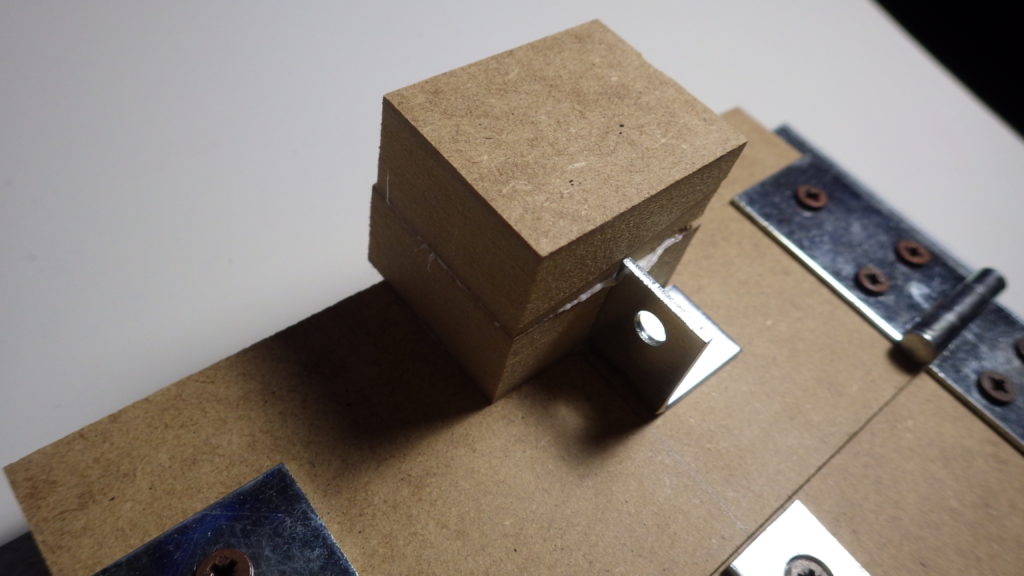
Second problem: I couldn’t find a big bracket wide enough, so, its holes were just 4 mm in diameter, not really a problem, but the longest bolt I could find for this diameter was 5 cm long, so 2 cm too short. I solved the problem taking a scrap of MDF, cutting it, and gluing, so the bolt would reach the surface to push easily. Another solution would have been to use a piece of threaded rod instead of the bolt, so we could just cut it the right length.
As you can see, it’s not at all a precision tool, so if we cannot find the exact bits we need to build it, we can just improvise!
The finished jig
We used an upper plate wider than the board because the easiest way to fix a bar of metal of random width and length, is to clamp it, so the extra naked steel surface of the plate makes for the perfect clamping place without ruining the jig
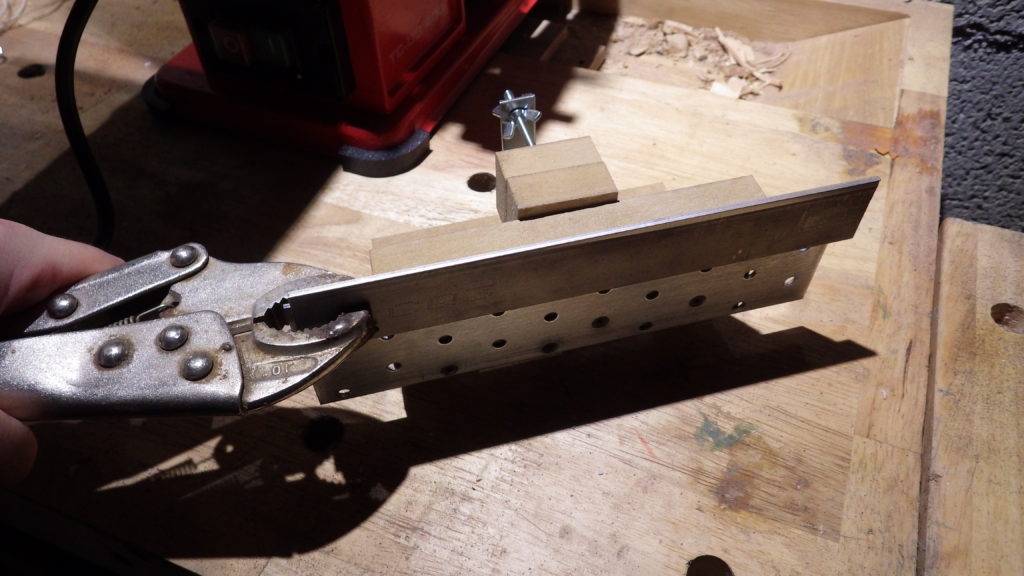

The clamp makes for a good handle too, while with the other hand you hold the body of the jig. Beware: small C clamps don’t get tight enough, and have a side that can rotate freely, this can let the clamped item rotate too easily while grinding, so avoid them.
This was really a fast and cheap way to build this jig, so I didn’t have the problem of cutting and welding metal!
Although this jig is light and small, it will work pretty well, but don’t forget that it lacks the stiffness of thick steel, so, don’t push hard while grinding, or it will probably bend, changing your angle irregularly with the uneven pressure you put. You really shouldn’t push anyway, because when pushing while grinding you get deep grooves that can be too deep, so it’s a bad habit in any case: if it’s too slow, just get a lower grit!
Nice Method tutorial. Too complicated 5 me tho XD.
Don’t be so sure of that, you’ll be surprised of how many things you’re able to create if you try! ; )